
HVOR ER DET BEST Å HANDLE?
Eiker Falcons har for øyeblikket ingen avtaler med noen hockeyleverandører. Vi har skrevet ned noen anbefalinger nedenfor.
- Handle utstyr på nett (feks. Hockeymonkey, eller Ebay). Dette er det billigste alternativet, du sparer penger selv om du må betale frakt og toll. Her får du mye bredere utvalg enn noen andre butikker. Du kan også sende pakken til en venn/familie i USA, da vil du slippe en tollgebyr på 25% av pris og frakt. Bakdelen med denne metoden er at du ikke vil kunne prøve utstyret før du eventuelt bestiller det. Du bør være ganske sikker på at det vil passe før du sender inn ordren.
- Handle utstyr i Sverige. Hvis du vil til en hockeybutikk anbefaler vi Team Sportia i Stömstad. Butikken ligger nær grensen. Her får du større utvalg til lavere pris enn det du får i Norge. Se Team Sportias nettsider for åpningstider og adresse.
- Hvis vi skulle nevne et alternativ i Norge ville det vært XXL. Her har de et lite, men ryddig utvalg av hockeyutstyr. Vi anbefaler ikke å gå til store innkjøp fra XXL, på grunn av prisforskjellen. Men enkle ting som teip, puck osv.
NB!! HUSK Å KJØP HOCKEYUTSTYR I RIKTIGE FARGER I STIL MED FARGENE TIL HOCKEYLAGET DITT, I EIKER FALCONS’ TILFELLE BLIR DETTE SVART UTSTYR MED GULE DETALJER.
++
Hockey Skate Buying Guide
Here is some advice from HockeyGiant.com on how to buy Ice Hockey Skates
Ice hockey skates are the defining piece of hockey equipment that makes our sport unique. Figuring out which ice hockey skates will provide the best fit for you is the most crucial decision you will make when buying hockey gear. They say that a good skater can skate on anything, but it would be a huge mistake to underestimate the importance of taking time to choose the skates that will enhance each hockey player’s specific style and needs based on their experience level and foot shape.
Hockey Skate Construction
Before you start looking at all of the different hockey skates that are available, it is important to understand the basics about how a hockey skate is built. There are three distinct but equally important parts of a hockey skate; the boot, the holder (plastic) and the runner (steel). Every manufacturer uses this same 3-piece construction model (2-piece, if you count the holder/runner as one) but there are many variations on each part of the skates that help distinguish one skate maker from the next.

Holders and Runners
Bauer uses TUUK holders and runners, Graf uses Cobra holders and runners, and CCM uses SpeedBlade Holders with HyperGlide runners. They accomplish the same key goal, which is to mobilize the skater, despite the small visual differences in design. Most introductory level skates use a one-piece holder/runner. The one piece holder/runner is appropriate for introductory level skates, but the two-piece design is better suited for competitive skaters. Typically, runners and holders only break when a high velocity shot is taken directly at the holder/runner. This is why intermediate and elite level skates use the two-piece design; the two-piece design allows you to replace the runner if it is broken.
If you break a runner with the one-piece system, then you have no choice but to replace both the holder and runner. If you do happen to break a runner or holder on a lower-priced pair of hockey skates, it’s often more cost-effective to simply take the opportunity buy a new pair of skates altogether, especially if you’ve gotten a fair amount of use out of them prior to the holder/runner breaking. The cost of purchasing the new holder or runner along with the cost of mounting the new holder will likely end up costing you about $40-50, which isn’t much less than another brand new pair of introductory level skates.
Hockey Skate Boots
Hockey skate boots have evolved into a rather complex piece of equipment when you consider the amount of technology that goes into building them. Manufacturers are constantly looking for innovative ways to create the lightest, most supportive and responsive skates. High quality boots are now made with materials like texalium glass, carbon composite, thermo-formable foam and anti-microbial hydrophobic lining. The quality of a boot can be measured by taking into account the weight, durability, comfort and protection offered. Elite level skates employ a few key features that will be discussed in more detail later. Here’s a simple breakdown of the boot components:
- Quarter package – the boot shell, which holds the padding and support inserts. The quarter package is stitched with precision to target specific areas for optimal flexibility and support in the boot
- Ankle padding – foam inserted into the quarter package for comfort and support
- Heel support – anatomically shaped «pocket» built into the quarter package which helps secure the foot inside the skate boot
- Tongue – protective coverage for the top of the foot and front of the ankle
- Outsole – rigid underside of the skate boot to which the holder/runner is mounted
- Footbed – removable, padded insert in the bottom of the skate boot upon which the foot rests
- Liner – surface material inside the boot which contains the padding and provides a secure, comfortable fit
Over time, every skater develops his own set of preferences as he becomes more familiar with the options and features that are offered with each skate model.
Identifying your foot type
When choosing ice hockey skates, the first thing a hockey player needs to identify is his foot shape. There are many companies that make ice hockey skates, such as Bauer, CCM, Reebok and Easton. Skates are generally assembled by similar processes, but there are some distinctions to be made regarding the overall fit and designs that make each skate manufacturer and model unique. For example, certain manufacturers make their hockey skate boots deep and wide, while others make their skates shallow and narrow. If you’re thinking about buying a new pair of hockey skates, do your best to find a friend who has the model you’re looking for so you can try them on or at least ask him about how the skates have performed. Everyone has a unique foot shape, and every manufacturer has uniquely shaped skate boots; so make sure you consider all of your options before deciding on a specific brand or model. What works well for someone else may not be the best fit for you.
Here’s a quick breakdown of the general fit provided by some of the popular skate lines available today:
| Hockey Skate Fit Profiles | ||||
|---|---|---|---|---|
| Model | Instep | Heel | Mid-Foot | Toe Box |
| Vapor | Regular | Slightly Narrow | Regular | Regular |
| Supreme | Slightly Shallow | Snug | Snug | Slightly Narrow |
| Nexus | Deep | Wide | Wide | Wide |
| RibCor | Regular | Slightly Narrow | Regular | Regular |
| RBZ | Deep | Wide | Wide | Wide |
| Tacks | Regular | Snug | Snug | Slightly Narrow |
| Mako | Regular | Slightly Narrow | Slightly Narrow | Regular |
The width and depth of your feet are going to be the most important pieces of information used when determining which skates will fit your feet best. Most companies offer a standard width boot (D or R) and a wide boot (E, EE or W) for each of the models they produce. In some cases they will also offer C width which provides a narrow fit. Paying close attention to these three attributes when you’re trying on skates will help you identify your foot-type:
- Width of your ankles/heels
- Thickness/depth of your feet
- Width of the front ¼ of your feet (toe box)
Generally speaking, if you’ve never had issues with width when purchasing tennis shoes then you will most likely fit well into D or R width skates. If you’ve experienced discomfort while wearing regular width shoes then you ought to consider E, EE or W width skates. Of course, the best way to find out is to try on several different models before making your selection. Once you have a good understanding of where you fit in comparison to the standard foot type then you can effectively choose a brand, model and width of ice hockey skates that will accommodate your foot type/shape. In order to further clarify the width sizing system, D and R are used interchangeably and so are E, EE and W. Most skates are offered in D or EE, but there are exceptions where R and W are seemingly arbitrarily substituted.
Intended use of the skates
At this point you should have a good understanding of which type of foot you have. That being said, the next thing to consider is the level of competition at which you will be playing. If the skates are going to be used for recreational purposes, then it is not absolutely necessary to choose a high performance ice hockey skate. If you are going to be playing competitive ice hockey, you ought to be looking at models that match your competitive level of play.
Competitive Hockey Skates
Competitive ice hockey is one of the most physically demanding team sports. Keeping up with the intensity and high-speed pace of the game is a challenge that needs to be met with an informed and deliberate decision when choosing ice hockey skates. Every hockey player is unique and has a skill set that should be identified and enhanced by the skates they are using. As mentioned before, each hockey skate manufacturer provides a tiered set of options within each line of skates that they produce (i.e. Bauer Supreme 2014/15 Hockey Skates – TotalOne MX3, 190, 180, 170, 160, 150, 140).
A hockey player who is serious about his effectiveness on the ice should be serious about the hockey skates that he is wearing; especially when you consider that your full weight is resting on blades that are about 1/8″ thick. Higher end models offer more than just a slick look and comfortable fit. When you choose a high performance skate you are paying for several important features:
- Lightweight materials for maximum speed and agility (composite quarter package and outsole construction)
- Highly durable boot and holder/runner construction for consistent, longlasting performance
- Thermo-formable foam padding (most upper end skate models can be «baked» to achieve a customized fit)
- Increased ankle support and boot stiffness
- Maximum padding and protection for vulnerable foot bones and tissue
- Precise, high-quality workmanship
Recreational Hockey Skates
Each manufacturer provides many skates to choose from based on the needs of the skater. For instance, CCM produces Tacks, RibCor and JetSpeed skates, and within each line you will have a series of skates that range from recreational specs to high performance pro specs. The recreational player or skater can choose a skate that is more affordable and will amply accommodate their need for a comfortable and supportive boot. All ice hockey skates double as a great choice for public skating sessions at your local rink, but you don’t need to pay a premium price if public session skating is the primary function of the skates. A pair of senior skates in the $100 or under price range will work perfectly for the recreational skater.
The bottom line is that you get what you pay for so be sure to pick a hockey skate that is equal to if not greater than the ability of the hockey player who is wearing them.
Ice Hockey Skate Sizing
In a perfect world every skate manufacturer would come to an agreement on a standard sizing system. But the reality is that although each brand is in the same arena there are some exceptions that need to be noted, even between models offered by a single company. Please refer to the hockey skate sizing chart for more information.
Hockey Stick Buying Guide
Here is some advice from HockeyGiant.com on how to buy Hockey Sticks
When hockey players are choosing a hockey stick they tend to be pretty picky about what they like, and what they simply can not stand to play with. The decision mainly comes down to the «feel» of the hockey stick. «Feel» is the term used to describe the player’s ability to accurately sense and control the puck with the hockey stick that they are using. This includes both offensive and defensive maneuvers, which consist of but are not limited to puck-handling, shooting, passing, reach and poke-checking. As a player develops these skills, they also acquire a better sense of which stick will do the trick for them.
What To Consider When Choosing A Hockey Stick
Wood Sticks vs. Composite Sticks
- Wood sticks and blades offer the best feel but the least durability.
- Composite sticks and blades provide better shot power and durability, but they do cost more and do not have quite as much of an overall authentic «feel» compared to wood sticks when handling the puck.
One-piece (OPS) vs. Two-piece Hockey Stick Construction
- One-piece sticks (also called OPS sticks), whether wood or composite, are designed to have a consistent flex point and shaft response because there is no break in the shaft where it meets the blade. One-piece sticks also tend to be lighter because there is no need for glue and there is no overlap of materials where the blade and shaft meet.
- Two-piece sticks give you the option of choosing the separate shaft and blade that you like, which you combine to create the stick that will work best for you.
Hockey Stick Shaft Flexibility
The shaft of a hockey stick is going to be rated with a number ranging from about 40 to 110. The higher the number, the stiffer the shaft. Heavier players need a stiffer shaft that can handle the stress of their weight on the stick, and lighter players will need a more flexible shaft that will respond to their weight and help them generate a more powerful shot. Typically, a defenseman may take more slap shots than a forward and should perhaps therefore go with a stiffer flex. Forwards tend to do more puck-handling and take more snap and wrist shots, so they won’t likely need as much resistance from the shaft to handle their shots. Personal preference also plays a large part in selecting the flex for your stick, so don’t feel hindered by these generalized suggestions. Here is a simple breakdown of the shaft flexibility in relation to the size of a player:

Blade Pattern / Curve
Curves are built mainly on these three options: curve type, curve depth and face angle. Blade lie is also an important attribute, but that will be discussed later in more detail. Generally speaking, defensemen require good control when making outlet passes and the ability to shoot hard and low, so it’s usually best to go with a slight or moderate mid or heel curve that has a closed or slightly open face angle. Forwards tend to do more puck handling and take more wrist and snapshots than slap shots, so a mid or toe curve anywhere from slight to deep, depending on the player, with a closed or open face angle would be appropriate.
It is absolutely a matter of preference when choosing a blade pattern so don’t be afraid to try a few different types. These are general recommendations and in no way should they be strictly applied. Finding the best formula for you as an individual player is a process that takes time, patience and willingness to experiment with different options.
Senior, Intermediate, Junior and Youth
The terms senior, intermediate, junior and youth are used to describe the general age groups of hockey players for the purposes of hockey equipment sizing. These categories are determined by the average dimensions (height/weight/waist size, etc.) of a hockey player at a certain age. Please refer to the chart above to see which category you fit into. Now that you know where you place in terms of general age group sizing, you’ll want to consider the stiffness of the shaft you will be using. It is important to refer to the sizing chart for general guidelines on shaft flexibility, but depending on how the hockey stick is going to be used, there are a few key things to take into consideration. Shafts are built in different sizes and strengths to fit a player’s needs based on his height, weight, strength and playing style. For instance, as stated previously, defensemen tend to take more slapshots and usually benefit from using a stiffer flex, whereas forwards are more inclined to take wrist and snap shots, so they typically benefit from using a more flexible shaft.
Hockey Stick Construction
Hockey sticks are made up of a shaft and a blade. Sticks have undergone drastic changes over the last 15-20 years with the advent of composite material technology. Despite its ever-changing «properties», the hockey stick will inevitably hold the same general geometric shape and appearance that it has for the last century or so. But with the endless research being done to create lighter, more durable materials for better performance, new and innovative construction methods have been discovered and have proven effective. The following section provides a brief history of the evolution of hockey sticks.
Wood Sticks & Aluminum Shafts
Traditional wood hockey sticks have been around as long as the game has been played. Wood hockey sticks make up a significantly smaller portion of the hockey stick market these days, but they are still used by many players who prefer more traditional equipment. In an effort to increase the durability and functional convenience of hockey sticks, the two-piece system was born. Aluminum shafts with replaceable wooden blades were introduced in the 1980’s and became very popular because the shaft strength was unparalleled by the wooden sticks that had been used for so many years. Wood blades and sticks are still considered by most to have the best «feel», but of course the durability and weight of aluminum and composite sticks have given them a competitive edge over the traditional wood stick.
Composite Shafts & Blades
In the mid to late 90’s, carbon fiber and Kevlar shafts were introduced as a lighter and more responsive alternative to aluminum shafts and wood hockey sticks. Replaceable carbon composite and Kevlar blades also made their way onto the market at this time and offered longer lasting performance, mainly because they are less susceptible to the water damage that causes wood blades to rot and split. Composite shafts are still farily popular today because they allow players to mix and match blades and shafts offered by different manufacturers.
One-Piece Composite Hockey Sticks (OPS)
With the turn of the century, there was a remarkable breakthrough in hockey stick technology. One-piece composite hockey sticks were created by taking the two piece system of a composite shaft and blade and combining it with the concept of the one-piece wood stick. This created the most dynamic approach to creating a stick that is both light-weight and durable, by the use of carbon composite materials, while still maintaining the benefits of the exceptional feel of the one-piece wood stick design.
There is a broad range of one-piece composite hockey sticks available from manufacturers such as Bauer, CCM, Reebok, Easton and Warrior. The Elliptical Taper featured on the Easton Velocity Sticks provides quicker loading for faster release on shots and maximum energy transfer. Breakthroughs in hockey stick performance, such as this, have been made possible as a direct result of the versatility of the composite materials being used.
Grip vs. Clear Finish
Choosing whether to use a hockey stick with or without a grip finish is an absolute matter of preference. Many players prefer the grip finish for the simple fact that the added texture keeps their hands from slipping on the shaft. Other players prefer clear finish shafts because they feel that the grip texture limits their ability to slide the bottom hand with ease. The third option, which has become much more popular recently, is the Matte finish, which is smooth and velvety, as opposed to the traditional slick gloss on clear finish sticks.
There are many different «types» of grip shafts. Reebok used to call their grip finish «Snake Grip»; Bauer uses «Griptac» and «Tactile Texture», and they previously called their grip finish Stick’Um; Sherwood experimented with «Shark Skin Fade». For the most part, a grip finish will feel pretty similar from brand to brand, regardless of what the manufacturer has decided to call it, but there are some exceptions. Most «grip» sticks feel like they have a sticky, rubber cement-like coating. Others, like the Sherwood Shark Skin finish, aren’t tacky, but they have an abrasive texture which feels like grains of sand under the paint.
When grip shafts first came out, it seemed like everyone was making the switch from clear to grip. But, according to manufacturers, it appears that the market has reached its point of equilibrium – approximately half of the players are using grip and half are using clear finish hockey sticks. Once again, its a matter of preference and you should experiment with both options.
Consider Your Options
The hockey stick market is being driven not only by the ever-increasing competitiveness of the players, but is also being fueled by fierce competition between the «twigmakers» themselves. This is great for the players because the result has been an innumerable amount of options available in all price ranges. You can find a decent composite stick these days for around $50 – 60. Top of the line models tend to run around $200 – 260 when they are initially released. Of course there are great, mid-range composite sticks produced as well, which deliver high performance results at a more affordable price, approximately $120 – 180. Over time, stick prices tend to come down pretty substantially, especially with the introduction of the newest models each product-calendar year. So, always watch for the year-end clearance sales on last year’s merchandise.
Hockey Stick Blade Patterns
Fortunately, hockey sticks come in many different sizes and «patterns» that focus on the various strengths and tendencies of each hockey player as they handle the puck. The «pattern» of a stick refers to the specific type of curve that the manufacturer gives to the blade, such as the Pattern 88 (Lindros/Kane) curve which is made by Bauer and the Pattern 42 (Duchene) curve made by Reebok. There are usually somewhere between 5 to 10 different blade patterns available from each stick manufacturer. Each blade is engineered to focus on enhancing a unique combination of the different aspects of stickhandling: shooting, passing and puckhandling.
A few terms that you’ll want to become familiar with are curve direction, curve type, curve depth, face angle, blade length, and lie.
Curve Direction: When you’re looking at a blade from the top view, it will look like the left or right curve pictured below. If you have never played hockey before, or you’re at the very beginning stages of becoming familiar with hockey and have not yet solidified your decision regarding which way to shoot, there are some points to consider. There are different schools of thought on how to decide which way you ought to shoot, but the short answer is that your dominant hand (usually your writing and throwing hand) should be the top hand on your stick. This should give you the greatest amount of control over your stick as you puckhandle and shoot.
So, if you write with your right hand, you should select a «Left» curve, because your dominant hand (right) will be on the top end of the stick.

Curve Type: There are basically 3 curve types (heel, mid & toe) that you can find in conjunction with the many other blade options previously mentioned. It’s pretty straight forward, so when you see a heel curve this means that the curve of the blade begins at the heel as opposed to starting towards the middle or toe of the blade.

Curve Depth: The depth refers to the degree of the curve, whether it’s slight, moderate or deep.

Face Angle: Face angle is best understood by looking at the concept behind a set of golf clubs. A closed-face angle hockey blade would be like a 1 Iron, whereas an open-face angle blade is equivalent to something like a pitching wedge. The range is anywhere from closed face (cups over the top of the puck) to open wedge (angled back away from the puck).

Blade Length: The blade length is exactly what the description denotes (short, medium or long).
Lie: The lie is a representative measurement of how the blade is angled in relation to the shaft, which determines how the blade will rest on the ice. Higher lies are usually best for bigger players who skate more upright. Lower lies work better for smaller players and those who tend to skate bent over, closer to the ice. You have found the correct lie when the middle portion of the underside of your blade is resting flat on the ice, rather than resting on the heel with the toe off the ice or vice versa. Below is a diagram that visually displays the concept of blade lie.

Main points to consider when picking a blade pattern
- Deep curves make it easier to lift shots on the forehand and slight curves give you more overall control of the puck on the forehand and backhand.
- Closed face angle blades are great for puck protection on the forehand and open face angle blades provide an even greater ability to lift the puck with ease.
- The puck will naturally rest on the heel, mid or toe of the blade depending on which one of these types of curves you choose.
As noted before, you must be willing to experiment with different patterns in order to find the one that fits you the best. For more information, click on the following link which will take you to our Hockey Stick Blade Charts.
You’re Ready To Buy A Hockey Stick
Now that you have a pretty good understanding of what makes each hockey stick unique, we’ll review the 6 factors that should be considered when you choose the best hockey stick for you. Always keep these factors in mind when you’re purchasing a hockey stick.
- Flex
- Length
- Weight
- Durability
- Blade Pattern
- Shaft Finish
Hockey Stick FAQ’s:
What’s the difference between tapered and standard blades and shafts?
The opening at the end of a hockey shaft into which a blade is inserted is called a hosel. There are essentially 2 different hosel types: Standard .620″ & Tapered .520″ – they are not interchangeable. Standard .620 (non-tapered) blades will only fit into Standard .620 (non-tapered) shafts, and Tapered .520″ blades will only fit into Tapered .520″ shafts.
In addition, blades are manufactured in Senior, Intermediate and Junior sizes. Junior blades will only fit into junior shafts; senior blades are most often manufactured to fit in both senior and intermediate shafts. Most manufacturers do not make intermediate blades, though most will offer an intermediate shaft.
If you are unfamiliar with the way a hockey stick curve looks, the image below shows you a top view of a left and a right hand curve. If your bottom hand is your left hand, you use a left-handed stick. If your bottom hand is your right hand, you use a right-handed stick.
How long should my hockey stick be?
Hockey stick length is ultimately a matter of personal preference, but it is most certainly a major factor as it relates to your ability to both handle and shoot the puck – it can even affect your skating ability. The general rule on stick length is that while you’re wearing your skates, with the stick standing upright and perpendicular to the ground, the top of the shaft should come up to the underside of your chin.
Hockey sticks come in 4 main sizes: senior (60″), intermediate (57″), junior (52″) and youth (48″), with a small amount of variance from one manufacturer to another. Hockey sticks are routinely cut down or extended (with an extender plug in the top end of the shaft) to accommodate the player’s individual height. It’s important to purchase a stick that is as close to the proper length as possible, but keep in mind that hockey stick flex is affected by length and should be considered while selecting the length of stick that you’re ordering. This is because when you cut a stick down or add an extender to the top of the shaft, it causes the flex rating to change. Read on in the answer to the following question for further explanation of flex ratings.
What is hockey stick «flex»?
There is a general rule of thumb that will help you find the appropriate flex rating for yourself: take your weight in pounds and divide it by 2. So, if you weigh 200 lbs, you should use a 100 flex stick. Personal preference, playing style, position and several other factors come into play as well, but the half-weight rule is a good place to start.
Hockey stick flex ratings are indicated by a number ranging from 30 (very flexible, whippy) to 115 (very stiff). Youth sticks are for the shortest, youngest players, and they usually come in a 30, 35 or 40 flex. Junior sticks are best for 7 to 13 year old players and usually have a flex rating of 45, 50 or 55 flex. Intermediate sticks are usually best for young teens and come with a flex rating of 60, 65 or 70 flex. Senior sticks are for adults and full grown teens and they come with a flex rating of 75, 85, 100, 110 and 115 flex. The higher the flex rating, the stiffer the stick is and the harder it is to flex.
The flex rating is actually a number that indicates the amount of pressure in pounds that is required to flex the center of the stick 1″. So, in order to get a 100 flex stick to flex 1″, you must apply 100 lbs of pressure to the center of the shaft. As discussed in the answer to the previous question about stick length, when you change the length of a hockey stick by cutting it down or putting an extender in the butt end of the shaft, it affects the flex rating of the stick. If you cut down a 100 flex stick from 60″ down to 58″, for instance, the flex rating will go up to about 108, making the shaft stiffer and more resistant to flexion. Conversely, when you put a 2″ extender in the end of a 60″ stick with a 100 flex rating, the flex rating will go down to approximately 92, making the shaft more flexible.
Which blade pattern should I choose?
Selecting a blade pattern is a bit like selecting a golf club out of your bag, in the sense that each club will give you slightly different results and is intended for specific types of shots. Although, when it comes to selecting a blade pattern, you also have to account for your ability to puckhandle and pass with the blade, and you’ll also likely be taking wrist, snap, slap and backhand shots, all with the same blade! Every blade pattern has unique characteristics that enhance certain shot types, puckhandling maneuvers and passing methods. Your goal should be to identify the aspects of puckhandling and shooting that characterize your playing style as an individual, and then select a blade pattern that will help you perform those maneuvers to the best of your ability.
We recommend trying several different blade patterns before settling on one, just to make sure you have an understanding of what each blade pattern can do for you as a shooter, passer and puckhandler.
If you would like to read more about selecting a blade pattern, read the section above entitled Hockey Stick Blade Patterns or you can read an even more comprehensive article on the HockeyGiant.com Blog entitled How to Choose a Hockey Stick Blade Pattern.
Additional Information About Hockey Sticks
Tapered vs. Standard Hosel
The hosel is the rectangular end of the blade which is inserted into the open end of the shaft. There are two different Senior sizes manufactured: Standard .620″ and Tapered .520″. Standard blades will NOT fit into tapered shafts and tapered blades will NOT fit into regular shafts. The general idea behind a tapered shaft and blade is to decrease weight by using less materials. Tapered shafts also load and release more quickly than standard shafts, theoretically speaking. Standard shafts and blades are more common, but the number of tapered shafts and blades manufactured is steadily rising.
Cutting your stick down to size
If you take a look at the shaft flexibility chart above you’ll notice the approximate stick length for each corresponding flex. The length of the stick is measured from the top of the shaft down the back side to the heel of the blade. Naturally, most players will find that sticks do not come at exactly the length they need right out of the box and therefore you must cut an inch or two off of the top of the shaft. Conversely, taller players may need to add an extender to their shaft if it is too short. When you are standing on your skates with your stick upright, on the toe, perpendicular to the ice, the top of the shaft should stop just below or above the chin, depending on personal preference.
Defensemen tend to use longer sticks which provide greater reach when poke-checking. Forwards tend to use shorter sticks in order to handle the puck with greater mobility and keep it closer to their body. You might find yourself to be more comfortable using a longer or shorter stick than players traditionally use at your given position. Once again, this is a matter of preference and you ought to experiment with different lengths in order to find the best fit for you.
Taping your stick
The next time you get a chance to take a look at a stick rack on the bench at a hockey rink, you’ll notice a staggering degree of variation in the way that each stick is taped. There are «right» and «wrong» ways to tape your stick, although many will argue that the two pathetic strips on the toe of their blade are placed with purpose. Anyhow, the reason that you tape your blade is to increase the amount of grip that your blade has on the puck. Additionally, to a certain degree, tape protects your blade from other sticks and skates that it will inevitably come into contact with during play.
There are tricks of the trade that some players choose to employ, and others simply don’t. The key is to make sure that any portion of the blade which could come into contact with the puck while you’re handling it or shooting it is taped. The traditional way to tape a blade is to start at the heel and wrap the blade from bottom to top, overlapping each strip just slightly with each pass, working your way towards the toe. But there’s no harm in going the other direction… is there? Once again, this is a matter of preference, and you will find your own way over time. Many players consider this a sacred art, so act accordingly.
You will also want to tape the top of the shaft (butt end). There’s a good amount of variation in the size and shape of the knob that each player puts onto their butt end. Taping the butt end will give you a better grip on the stick, and if you drop it (a crying shame if you do) then a big butt end will elevate the stick off of the ice just enough to pick it up without making you look like an idiot without fingernails trying to pick up a quarter.
Hockey Gloves Buying Guide
Function
Each piece of hockey equipment is important and should work together for the benefit of the player using them. Hockey gloves are made to protect your hands from sticks, pucks, skates and anything else that your hands might come into contact with on the ice. Obviously, protection should be your first priority, but nothing is more frustrating than a pair of cumbersome hockey gloves that are working against you as you try to perform the fundamentals of passing, shooting, and puck-handling. If your gloves are too big or too small they can keep you from having the necessary amount of mobility in the wrist and fingers, and sensitivity to the stick while you’re trying to handle the puck.
Hockey Glove Features
Choosing the right hockey gloves will come down to a few specific things:
Nylon vs. Synthetic Leather Shells
Authentic leather is no longer typically used to construct hockey gloves. Synthetic leather is a lighter, more durable alternative that doesn’t hold water and harden the way that authentic leather does. Synthetic leather shells are very durable and in some instances don’t tear quite as easily as gloves with a nylon shell. Nylon shells are usually a bit lighter and more breathable than synthetic leather shells, though.
Many hockey glove models, and particularly the higher quality gloves, are constructed with synthetic leather and nylon, taking advantage of the benefits that each material offers. If you prefer the look and feel of nylon shell gloves, though, there are plenty of great options available, and the lack of synthetic leather is not necessarily indicative of a low quality glove. Sometimes it’s simply a matter of stylistic choices made by the manufacturer.
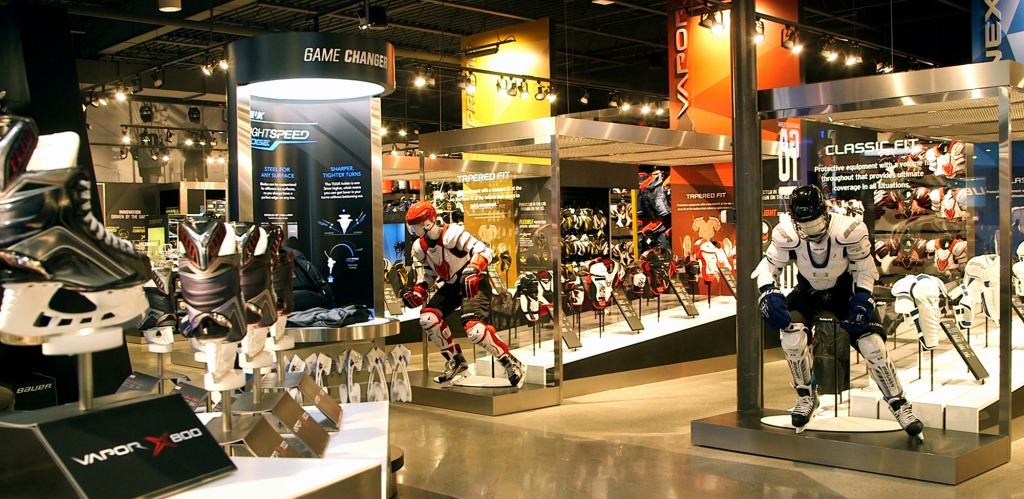
Tapered Fit / Traditional Fit / Anatomical Fit
As it is with most other hockey glove features, the choice between tapered and traditional fit is a matter of preference. There is quite a difference between the feel of traditional, 4 roll style gloves and anatomical gloves with additional padding segmentation. Anatomical gloves provide a snug, form-fit feel and allow a player to get the most consistent response from the gloves since they have very little negative space (wiggle room). The tapered fit offers some additional volume in the wrist and hand areas, which is a popular construction type.
Some players find the antaomical and tapered fits to be too «constrictive». So, traditional, looser-fitting gloves are just as effective for those players who prefer to have a little bit more breathing room for their hands. That being said, it’s equally hampering to a player’s puck-handling ability to wear gloves that are too small as it is to wear gloves that are too big. Therefore, regardless of the style that you choose, it’s imperative to wear gloves that fit your hands properly.
Bauer actually has 3 distinct protective lines with different fit types, offered in the form of their Supreme, Vapor and Nexus lines of gloves. The image below allows you to see the visual differences between the 3 fit types.

Thumb Locks
The majority of hockey gloves on the market are now made with a thumb lock system which can be incredibly effective in protecting your thumbs from hyper-extension upon a collision or physical play where contact with the thumb is made. Basically, the gloves are constructed so that a solid plastic insert flexes in only one direction, towards the palm of the glove, which enables you to grip the stick but prevents you from the unnecessary and dangerous flexing of the thumb joint in the opposite direction.
Padding Shapes and Divisions
Traditional hockey gloves tend to have 3 to 4 horizontal pads that flex on the top of the hand and 2 pieces of padding in each finger which allow for ample flexibility in the joints of the second knuckles (see the Bauer Nexus 1000 Gloves above). Some hockey gloves though, will have several pieces of variably shaped foam padding on the top of the hand and in the fingers that are inserted and divided in a way that allows for even more glove flexibility and overall hand movement (see the Reebok 9K KFS Gloves above). The choice is yours, and it’s simply a matter of preference. It’s best to try on several different styles of hockey gloves in order to figure out which ones feel most comfortable on your hands.
Hockey Glove Palms
Hockey glove palms are generally constructed with one or two layers of material that feels like a cross between soft leather and suede. As you browse through the gloves you’ll find a plethora of different names for the various palm materials, such as Nash, Clarino, MSH1 and Lycra. Most hockey gloves have nash palms, but not all nash palms are created equal. Regardless of what the manufacturers call the palm materials, there’s a noticeable difference in quality when you compare the palm materials on a pair of $40 gloves and $160 gloves. In addition, some gloves have features like reinforced palms for increased durability, grip texture for a firm grasp on the stick, thin shock-absorbing pads, and mesh gussets lining the sides of the fingers for better ventilation. These are all features that you may want to consider when choosing a pair of hockey gloves.
Long Cuff vs. Short Cuff Hockey Gloves
Long-cuffed gloves will give full coverage to the wrist and forearm and won’t leave space between the elbow pads and gloves. The downside is that in most cases a long-cuffed glove will provide less mobility in the wrist. Short-cuffed gloves will give you more wrist exposure which can leave you open to more slashes, pucks and skates, but with the proper elbow pads and optional slash guards it can be worth the trade-off for a player who handles the puck often and needs greater freedom for wrist movement. In any case, the trend in recent years has been toward the manufacturing of short-cuffed gloves, almost exclusively. You can still find long-cuffed gloves here and there, but with the improvements that have been made to slash guards/wrist guards, long-cuffed gloves are simply less preferable for most players.
Hockey Glove Sizing
Hockey gloves are one of the toughest pieces of equipment to accurately size without actually trying them on. Gloves sizes are measured in inches, but here’s where it can get a little bit confusing. When you see a pair of 13″ gloves the gloves aren’t actually 13″ long from tip to tip. As you can see in the image below, we measured a pair of 13″ Bauer Supreme Hockey Gloves from the tip of the middle finger to the edge of the cuff and came up with about 11.5″. So, how do the manufacturers arrive at 13″?

In order to find your glove size you need to measure from the base of your middle finger on the palm side of your hand up to the crease of your elbow. This is probably the best method available, apart from actually trying on the gloves. Take into account that if you have proportionally longer or shorter fingers than normal then you may need to go up or down 1″ in order to get the best fit. Also, certain models run bigger/smaller than standard so you’ll want to keep that in mind as well. In most cases, the method that we recommended is very accurate and ought to work well across the board. From one manufacturer to the next there’s a fairly good degree of consistency.

Hockey Gloves that «Fit Like a Glove»
High quality hockey gloves should offer great overall protection and a comfortable fit, and you may not necessarily need to spend $180 to get a pair that will prove effective for you; although, it never hurts to go with that fancy pair sitting on the top shelf. A great pair of hockey gloves shouldn’t really be noticeable to a player when they are in the middle of a game, much like a referee. If you find yourself constantly readjusting your hands inside your gloves throughout the game, or if it feels like your gloves are simply in the way while you’re playing, then you really ought to consider looking for some new mitts.
Simply put, proper-fitting gloves should feel like they’re part of your body. Find a pair that simply feels the most natural for you and understand that the cost of the gloves is a reflection of the quality of the materials being used, and the amount of technology that has been implemented into the construction of the gloves. More expensive pairs are likely to last longer and provide the best overall feel. And always consider the variables that have been discussed here when choosing the gloves that will be right for you.
Hockey Helmet Buying Guide
Ice hockey is a contact sport, whether you’re playing in a full contact league or not. Inevitably, every player is bound to get bumps and bruises regardless of how well-protected they are. With that in mind, it is essential to protect your head sufficiently with an HECC, CSA & CE approved helmet. Ice hockey has evolved into one of the fastest team sports on the planet and hockey players are bigger and strong than ever before. This means that concussions and other head related injuries are much more probable if the correct fit and degree of protection are not met.
Hockey Helmet Manufacturers
There are many hockey helmet manufacturers to choose from like CCM, Reebok, Bauer, Easton and Tour. There are other helmet manufacturers, but the ones mentioned here are currently the main producers for the hockey helmet market and they have established themselves as reliable companies for all protective hockey gear. Each of these brands offers hockey helmet models that accommodate the protective needs of beginners and elite level hockey players alike.
Hockey Helmet Construction
Hockey helmets have a shell, inner padding, and hardware that will hold the helmet together and allow for size adjustment. The shell is made of plastic, although some pieces may be made of lighter, composite materials. The padding inside the helmet is made with dense foam that is designed to absorb the shock from contact made with the head from a check, a stick, a puck or contact with the ice and boards. Almost all hockey helmets are adjustable lengthwise, and some can be adjusted for width as well. The majority of hockey helmets are adjusted by loosening the screws on the sides of the helmet so that you can pull the front and back pieces of the shell apart, and then re-tighten the screws to hold the pieces in place at the desired length.
Special Features
Each manufacturer constructs their helmets in similar fashion, but there are certain features that are specific to one brand/model.
Occipital Locks
Occipital locks are now commonly implemented in many high-end helmet models. The occipital lock cups the back of head below the occipital ridge and is designed to keep the helmet from coming loose upon heavy impact. The adjustment dials are typically located on the back of the helmet and are fairly easy to operate. Pictured below is a view of the occipital lock on the old Bauer 9500 Helmet. The dials slide left and right to push the lock forward, securing the helmet in place on your head.

Tool Free Adjustment
Most helmets are adjustable in some way. Elite helmet models can often be adjusted mechanically lengthwise, without tools. This tool-free adjustment capability is a convenient feature that is not always available on lower end models, but is becoming more and more common. On most helmets that have tool-free adjustment capabilities, you simply flip up the 2 side latches or single back latch, move the helmet shell pieces apart or together and then re-close the flaps. This is a more convenient method than unscrewing the helmet on both sides and re-tightening the screws once you’ve moved the shell pieces to the desired length. Tool-free systems can be easily operated, often with one hand, even while the helmet is on your head, which is preferable to taking it off and putting it back on with each adjustment.

High Quality Foam
Another feature available in higher end model helmets is high quality, concussion-preventive foam, such as EPP, FXPP, and Poron® foam (exclusive to Bauer). This type of foam absorbs the maximum amount of shock from collisions and is more likely to help prevent concussions. EPP foam is used in many industrial applications and is incredibly durable. Players who are competing at an elite level should absolutely consider using a high quality helmet with high density foam for added protection. However, using a top of the line helmet is always a great choice, regardless of the level at which a player is competing.
Helmets with high density foam usually have a second layer of softer foam which provides more comfortable cushioning between your head and the high density foam.
Hockey Helmet Sizing
A hockey helmet ought to fit snugly without constricting the head. The front of the helmet should cover about half of the forehead and come down over the hairline to the sideburns, even with the cheekbones. The top of the head should be completely covered with protection extending to the back of the head just above the hairline where the neck and head meet. The helmet should rest securely on the head with no room for the helmet to jiggle around. Manufacturers have specific sizing measurements for each helmet model, so be sure to check the sizing charts to find the correct fit.
Ice Hockey Pants Buying Guide
Here is some advice from HockeyGiant.com on how to buy Ice Hockey Pants
Ice hockey pants are more accurately described as heavily padded, oversized shorts. Ice hockey pants are typically constructed with a polyester/nylon shell and cotton or foam lining that contains built-in, hard padding in the hips, thighs, spine, kidney area, and tailbone. In order to ensure full protection from your pants, the bottom of the pant leg should rest on the top of the knee cap protector of your shin guards; the top of the hip and spine protectors should reach the bottom of the rib cage and protect the lower back.
Function
Ice hockey pants function as an important piece of protective gear. Considering the physical nature of the game (body checking, shooting, unforgiving boards, rock-hard ice, etc.), it is guaranteed that your body will take a beating, especially without proper protection. Ice hockey pants are made to fit comfortably and allow for good range of motion while still protecting the player. Manufacturers such as Bauer, CCM, Reebok and Easton offer several models of ice hockey pants within each product line with varying degrees of protection and features. Top of the line models are going to be more protective and offer more special features than recreational level pant models.
Features
There are certain, basic features available with some hockey pants that are not available with others. Here’s a list of a few options to consider when choosing the right pants for you:
- Drawstring for tightening the front closure of the pants
- Adjustable waist belt for tightening the waist band of the pants
- Suspender buttons on the front and back of the pants
- Inner-leg zippers which can be unzipped to increase mobility and ventilation in the thigh region
- Adjustable padding which allows the skater to achieve a more «customized» fit
In addition to these basic features, top model ice hockey pants are made with more breathable, durable materials that are anatomically constructed to provide the best overall fit and highest degree of protection and mobility.
Manufacturer-Specific Fit
Each manufacturer constructs their pants to fit just a little bit differently. Easton Mako Ice Hockey Pants are made with a slim-fitting, contoured design which eliminates negative space in the pants and enables the player to maneuver with ease. Bauer Nexus Ice Hockey Pants are made with an unmatched level of superior protection in mind, and offer a more traditional, looser fit that gives the player a bit more breathing room in the pants. Each brand and model provides a unique fit that each player will become more familiar with as they develop their own personal preferences in regards to the overall fit and style offered by each manufacturer.
Meeting Your Protective Needs
It’s important to identify the needs of each individual player and find an appropriate combination of protection and fit based on the level of competition at which they’re playing. If an elite level player is wearing pants with minimal protection then they are more likely to get hurt because of the speed and intensity of the game. When it comes to protective gear, it’s never a bad choice to equip yourself with the best gear available, but of course it’s not absolutely necessary for a Squirt B league player to wear top of the line ice hockey pants. You ought to select a pair of ice hockey pants according to how well they fit your body, the amount of protection you will need for the level at which you are playing, and your personal playing style. Always wear ice hockey pants that fit correctly, otherwise the pants will leave your body exposed in areas that need coverage, and may also limit your range of motion which can keep you from skating to your full potential.
Hockey Shin Guards Buying Guide
Here is some advice from HockeyGiant.com on how to buy Hockey Shin Guards
Function
Hockey shin guards are worn to protect your knees, shins and calves. With skates, sticks and pucks constantly moving around on the ice at high speeds, it is imperative that you wear shin guards that fit properly and offer good overall protection for your legs.
Protection By Position
Defensemen
Defensemen have the responsibility of protecting their net at all costs, which entails staying between the opposing puck carrier and the net at all times, often blocking shots with their shin guards. Forwards also share this responsibility, but because of the nature of a defenseman’s position he is more likely to encounter situations where he’ll have to block shots and put himself in harm’s way. So it’s usually best for a defenseman to wear wider, thicker shin guards that offer a greater degree of overall protection. Typically, models that are relatively wide offer great protection for defensemen, but of course can be used by forwards as well. It all depends on the needs of the individual.
Forwards
By the nature of their position, forwards are usually more offensively-inclined players and ought to choose a pair of shin guards that are light-weight, slim-fitting and made for increased mobility, while still protecting them from errant pucks, sticks and skates. Some forwards are more defensively inclined and have a greater tendency to block shots and therefore ought to consider shin guards that offer the same degree of protection as those worn by defensemen.
Shin Guard Features
Shin guards serve a simple function and therefore they are constructed in a relatively simple way. But there are certain features that set some models apart from others.
- Straps – All shin guards are secured with 1 to 3 Velcro straps. Typically, higher end models have more straps than lower end models and they also provide a more comfortable and secure fit. Most models use the standard 2 strap system with 1 behind the knee and 1 behind the lower portion of the calf. But some other models have a unique cross+over strapping system which provides a great alternative to the standard lateral strapping system. High quality straps maintain their elasticity longer and are often padded, as well, to provide additional comfort.
- Removable Padding – Some shin guards have removable shin padding/lining which is attached with Velcro and can be removed and washed in your washing machine. It’s a convenient feature, but has no bearing on the performance quality of the pads.
- Shock-Absorbing Knee Caps – All shin guards are made to absorb and deflect the shock of contact made with your shins/knees, but the technology does vary from one model to the next.
- Calf Protection – All shin guards have some degree of calf protection, but elite models offer much more overall coverage for the backside your legs.
Fit & Sizing
Hockey shin guards must fit properly and comfortably. Sit in a chair with your feet flat on the floor and measure from the bottom of your knee cap down to the end of your shin where it meets your foot. The point on your shin/ankle to which you measure should be the desired length of the shin guards that you intend to wear. Basically, the end of the tape measure should stop where you want your shin guards to reach.
There are two ways to wear your shin guards: over the tongue of your skates or tucked behind the tongue of your skates. This is a matter of preference and it should be taken into account when choosing shin guard length/size. Your knee cap should rest square in the middle of the knee cap pocket of the shin guards.
Hockey Elbow Pads Buying Guide
Here is some advice from HockeyGiant.com on how to buy Hockey Elbow Pads
Function
Hockey elbow pads are an essential piece of equipment. Elbow pads are obviously worn to protect your elbows, but they also provide protection for your upper forearms and lower biceps/triceps. Whether you’ve been playing hockey for 30 years or you’re just getting started, you will fall on the ice from time to time. When you fall (this is said with absolute certainty), your reflexes will tell you to brace for impact with your hands and elbows. When this happens, if you don’t have proper protection on, you’re asking for a shattered elbow. Therefore, it is crucial to wear secure, proper-fitting elbow pads so as to avoid any pad slippage which could leave the elbow exposed and cause serious injury. In addition to protecting yourself from falls, as a hockey player you need to protect yourself from the other players whose job is to check, hook, slash and trip you.
Hockey Elbow Pad Construction
Elbow pads are generally constructed with 3 main parts: the elbow cap, forearm protector and bicep protector. Each piece provides necessary protection, but the most important component is the elbow cap because your elbow is one of the most likely of your body parts to come into contact with another player, the boards or the ice. Most elbow pads have good quality elbow caps but everyone’s arms are differently shaped so what works well for you may not necessarily be a good fit for someone else.

Hockey Elbow Pad Features
There are some key differences in the way that elbow pads are constructed which you may want to consider before choosing the pair that will work best for you.
Straps
Most elbow pads come with 2 to 3 velcro straps that secure the pads around your arms. Introductory level models often have just 2 straps and usually they lose their elasticity at a faster rate than the straps on elite level models. Also, some elbow pads have straps that cross over one another, like the X-Strap system, rather than attaching straight across which is more traditionally used. Neither system has proven to be superior to the other, but each style is worth trying out in order to figure out which you prefer. For additional comfort, some elbow pads also have padded straps which keep the elastic bands from pinching your arms.
Internal Arm Sleeves
For additional «stabilizing anchor support» as some manufacturers call it, some models come with an elastic, internal sleeve which helps secure your arms in the elbow pads.
Extended Forearm Protectors
In highly competitive hockey leagues, additional protection may be necessary for players who are hooked and slashed on their arms more frequently. As an alternative, wrist protectors are sold separately and can provide supplemental protection for your wrists and lower forearms.
Elbow Caps
Although most elbow pads have hard-shell caps, which are the best protective choice, some players prefer soft-shell caps because they aren’t quite as stiff. Soft-shell caps have foam padding in the elbow rather than a hard plastic insert.
Proper Fitting Elbow Pads
Hockey elbow pads should cover the area from the middle of your biceps (meeting the shoulder pad bicep protector) to the middle of your forearms (meeting the cuff of the gloves). The joint of your elbow should rest squarely in the cup of the elbow pads. In order to secure the elbow pads in place there are usually two or three adjustable straps that can be tightened around the forearms and biceps. Physical, aggressive players tend to use larger, bulkier pads, whereas finesse players will choose elbow pads that are more slim-fitting for increased mobility. The key is to find elbow pads that feel comfortable and secure and offer greatest amount of coverage. Please refer to the sizing guides to ensure a proper fit.
Hockey Goalie Leg Pads Buying Guide
Here is some advice from HockeyGiant.com on how to buy Goalie Leg Pads
Function
Goalie leg pads are worn by goaltenders to protect their legs from pucks, sticks, skates, and anything else that they might encounter during game play. Every goalie has his own style of play and his own set of preferences when it comes to the gear he chooses to wear. The function of the pads, which is to protect, remains the same from one pair to the next – but we’re not comparing apples to apples, so it’s important to make note of the many options that are available to you as an individual player.
Leg Pad Construction & Materials
Goalie leg pads are constructed with various materials, such as synthetic leather, nylon and different types of foam padding. Different types of materials are used for each specific part of the leg pads, enabling manufacturers to construct the pads in such a way that the leg pads will offer optimal protection, comfort and durability. Of course, the quality of the materials used varies from one pair of pads to the next, so you shouldn’t be surprised to find that $1500 leg pads offer superior comfort, protection, weight and durability when compared to leg pads in the $300 price range. We’ll discuss some of the pros and cons of the materials used for each part of the leg pads, as well as the different functions and purposes that they serve.
Leather Straps vs. Nylon Webbing Straps
Leather Straps
Elite level goalie leg pads are usually equipped with leather straps and metal buckles. Leather straps have been used for many decades and are still the preferred choice of most elite goaltenders, due to the comfort and superior fit that they provide. They are just a bit heavier than nylon webbing straps, but in the opinion of most goaltenders, the durability and ease with which they can be adjusted certainly makes up for the small amount of added weight. You may find that some mid to high end pads will use nylon thigh straps rather than leather thigh straps. This is because the thigh straps are typically worn very loose and require less frequent adjustment.
Nylon Webbing Straps
Mid level and introductory level goalie leg pads are typically equipped with nylon webbing straps and quick-clip buckles, also known as alligator clips. Nylon straps can sometimes be cumbersome to adjust, but once you’ve set the straps to the desired length the quick-clips are very easy to use. Nylon straps and plastic clips are more cost-efficient for manufacturers, but they aren’t necessarily inferior to leather straps – many goalies actually prefer the convenience of quick-clips and nylon straps over the classic fit and feel of leather straps and buckles.
Leg Pad Foam
In the past, manufacturers used materials such as horsehair and shredded packing foam to stuff the leg pads for protection and comfort. With the evolution of the material fabrication industry, more cost-efficient, higher-quality materials are now used to pad the walls of goalie leg pads. Goalie leg pad manufacturers will often use a proprietary type of foam (Shred Pak, Flex Pac, etc.) or various combinations of high-density foams and lower-density foams in their pads.
High density foams are used on the front and sides of the leg pads to help the pads retain their stiffness and shape, as well as providing great protection. Lower density foams are used to deaden the puck upon impact, which aids the goaltender in controlling rebounds. Lower density foams are also used in the interior leg channels to make the pads more comfortable to wear. Most high-end leg pads are constructed with proprietary foams or a combination of 2 to 3 foams of various densities. Entry level and mid level pads will most often use single-density foam to reduce cost and production time.
A high-quality pair of goalie leg pads will be constructed with several different types of foam which are strategically placed to target the goaltender’s need for comfort, protection and mobility. This is one of the features that you pay the extra cash for – light, durable, comfortable padding.
Outer Shell Materials
The outer shells of most goalie leg pads, especially higher quality pads, are constructed with synthetic leather, which is lighter and more cost-effective than authentic leather. Synthetic leather is also more durable and less likely to retain moisture, unlike authentic leather which tends to become much heavier over the course of a game. The side walls of many higher quality leg pads are made with synthetic leather as well, although some are constructed with high grade nylon.
Mid and lower level goalie pads are covered in heavy gauge nylon or Cordura to further reduce the weight and cost of the pads. These types of pads are normally for inline or street hockey use because nylon and Cordura are more prone to moisture absorption on ice surfaces. In addition, the durability and protective capability of these materials lend themselves more to inline hockey and street hockey and are not as well-suited for ice hockey. While inline goalies often use what’s considered to be an ice pad, like the Bauer Vapor X:40 Goalie Leg Pads, using inline and street pads such as the Tour EVO 6000 Goalie Leg Pads or Mission Grommet Goalie Leg Pads on the ice should be avoided at all costs because they do not provide ample protection on the ice. Ice hockey pucks are much harder and heavier than inline hockey pucks and street hockey balls.
Leg Channel Materials
The interior leg channels of goalie leg pads are typically constructed with nash leather and/or nylon. Some goalies have a strong preference regarding the leg channel materials because of the differences in texture and water absorption. Nylon leg channels usually allow the pads to rotate on the goalie’s legs a little easier than nash leather leg channels, which can be beneficial for butterfly goalies. Nash tends to provide a more secure fit, which is usually preferable for hybrid style goalies. This is just a minor detail, but still worth noting.
Butterfly vs. Hybrid
 When you’re looking to purchase a set of goalie leg pads, one of the questions you should ask yourself is whether you’re a true butterfly goalie or a hybrid goalie, since pads are generally constructed to suit a particular playing style. This is not to say that a hybrid goaltender cannot use butterfly leg pads, or vice versa, but there are distinct differences in the general construction of each leg pad type that enable a goaltender to perform certain maneuvers more easily and effectively.
Butterfly goalies rely heavily on positioning and technique, spreading both pads flat on the surface in order to take away as much of the lower net as possible – while still maintaining a big, upright position with their chest, arms and hands to minimize the amount of net a shooter sees. Hybrid and «ProFly» goalies tend to use a combination of butterfly, half butterfly and stand up styles and react to the shot, putting greater emphasis on their reflexes and athletic ability, rather than relying quite as heavily on perfect positioning in order to make saves.
Here are some of the features to take note of regarding the differences between Butterfly and Hybrid style goalie leg pads:
Butterfly Pad Features
- Flat face, pre-curved shape with no breaks on the vertical/side rolls. We are now seeing some manufacturers implementing internal flex breaks to allow some flexing of butterfly style pads.
- Butterfly pads are built to be fairly stiff (especially from the knee to the tops of the thighs), which allows them to hold their shape and limit bleed-through on shots – especially through the 5 hole.
- Thicker landing pads for knees (these are usually removable and adjustable). The thickness also varies depending on the quality level and maker of the pad. Thicker landing pads help reduce the strain on the hips and knees when in the butterfly position.
- Butterfly pads also have thicker calf risers to help maintain pad contact with the ice when in the butterfly.
- Shallower shin cradle to allow pads to rotate easier when butterflying.
- Squared up thigh and boot provide maximum coverage.
Hybrid Pad Features
- Traditional knee rolls (can be round or flat). Traditional knee rolls make it easier for a goaltender to flex the pads at the knees.
- Flex cuts on vertical side rolls (usually 1 to 3 cuts) above and below knees for easier flex.
- Thick landing pads to protect goaltender’s knees when «flopping» down.
- Deeper shin cradle to ensure pads stay in position as goalie moves around.
- Top of thighs may be angled inward for increased mobility, but most are now squared up to help with closure of the 5-hole when using the butterfly.
Goalie Leg Pad Sizing
Leg pad sizing can be a little bit tricky because every manufacturer uses a slightly different method when measuring their leg pads. It would be nice if you could simply look at a height chart and find the corresponding size – unfortunately, there’s a bit more that goes into it. The standard method for goalie leg pad sizing is based on the following formula:
- Your Skate Size
- Ankle to knee measurement (inches)
- Knee to thigh measurement (inches)
a + b + c = Your Leg Pad Size
So, for example, if you wear size 9 skates (a), have a 17″ ankle to knee measurement (b), and you measured 7″ from your knee up to the point on your thigh where you’d like the leg pads to reach (c), you should probably be wearing 33″ leg pads. I say «probably» because personal preference and manufacturer specificity come into play. The very best way to size yourself up for goalie leg pads is to try on the pair that you plan on purchasing. The method above is fairly accurate, but sizing consistency from manufacturer to manufacturer is still a little bit of a crapshoot. Your odds are «good», not «great». Use the formula as a general guide and you should be able to come within 1″ of the appropriate size for you.
Hockey Goalie Masks Buying Guide
Here is some advice from HockeyGiant.com on how to buy Goalie Masks
Function
Goalie masks serve the purpose of protecting the head of a goaltender from pucks, sticks and other dangers on the ice. The position of goaltender requires more protection than any other position on the ice, and proper head protection is of the greatest necessity for all players, especially goaltenders. It’s impossible to completely eliminate the risk of head injuries, but with proper protection the risk is dramatically reduced.
Construction
Goalie masks consist of a hard outer shell that is lined with foam padding, an adjustable backplate which keeps the mask secured by cradling the back of your head, and a metal cage which covers your face and allows you to see through the front of the mask. There are straps that run from the backplate to the mask shell which can be adjusted to provide a snug, secure fit.
Goalie Mask Features and Options
As is the case with any piece of hockey equipment, goalie masks are offered in many different shapes, sizes, colors, and designs, and they are also made with materials that deliver varying levels of durability, weight and comfort. When broken down into these three performance levels – Entry level, Competitive & Elite – you can see some key differences between «high quality» and «low quality» goalie masks. We’ll discuss three aspects/elements of goalie masks (Shell, Cage & Padding) which will make it a little easier to see exactly what you’re paying for when you fork out the extra dough for a higher quality mask. Keep in mind that although each individual feature may only slightly decrease in quality as you move down in price range, the overall quality of the mask varies more greatly when you look at each mask as the «sum of its parts».
Elite Goalie Masks ($500 +)
 Goaltenders that play highly competitive hockey will face harder, more powerful shots and therefore require a higher quality mask in order to properly protect themselves. Collegiate, junior, AAA and minor pro players should most definitely consider using an elite level goalie mask. Elite masks are usually handcrafted to ensure that they’re free from blemishes and structural defects. Elite level masks are almost always HECC and CSA certified.
Shell
Elite level masks usually contain carbon composite, high impact Ballistic Lexan or Kevlar in the mask shell, providing a stronger, lighter, more durable construction. Some elite level masks are constructed with fiberglass rather than carbon composite or Kevlar, but keep in mind that every material, fiberglass included, is produced in a wide range of compounds that vary in terms of overall quality. Only high quality materials are used in the construction of elite level masks.
Cage
The cage of an elite level mask is made with highly durable, rust-resistant materials such as titanium, which may also be chrome plated for an even stronger and more attractive finish. Reinforced cages are built to withstand high-velocity puck impacts, but a hard enough shot can cause any cage to bend. It isn’t necessarily commonplace, but high level masks are sometimes offered with the option of choosing different wire configuration styles at the time of purchase (Cateye, Standard Certified, etc.) as well, which is convenient for goalies who have developed a strong preference for one type over another.
Padding
The internal padding of an elite goalie mask will provide a more comfortable, contoured fit, with high quality foam to absorb shock from impacts, and gel pads to further increase the comfort of the mask. Several different types of foams are often used in the construction of the mask in order to maximize comfort and protection while minimizing the weight of the mask. When you put on a well crafted mask, you can definitely feel the difference.
Competitive Goalie Masks ($250 – 500)
 Mid-level goalie masks provide ample protection for the majority of goaltenders out there. Whether you’re a teenage player on a high school team or a beer leaguer playing on Sunday nights, this is probably the most appropriate type of mask for you. Mid level masks are very comparable to elite level masks at first glance, but there are some differences to take note of.
Shell
The shell of a mid level mask is usually made with highly durable fiberglass. Mid level masks tend to weigh just a little bit more than elite level masks, but the difference isn’t tremendous. It’s quite rare these days, because of the recent advances in material fabrication, but if a player takes a hard enough shot at a goaltender’s mask then it could chip or crack. In order to combat this kind of damage, certain parts of the mask are usually reinforced with composite materials – areas such as the chin, forehead and ear holes. Full composite masks are more durable than fiberglass masks, but there’s still a fairly low likelihood that a mid-level mask will chip, crack or break even when used by a highly competitive goalie.
Cage
Cages on mid level masks are pretty close to the quality of cages on elite level masks, and in some cases they’re exactly the same. High quality cages are usually slightly stronger and more rust-resistant than mid-level cages. Whether you’re wearing a $900 dollar mask or a $400 mask, if you take a hard enough shot to your cage then the wires are likely to bend out of shape. Elite level cages can withstand slightly greater impacts than mid level, competitive cages. Cages are often interchangeable, with a few exceptions, so you can always shop around to find one that you like better than the one that comes with your mask. Always feel free to contact a Hockey Giant customer service rep in order to verify cage compatibility.
Padding
Mid level, competitive masks are very well padded and provide a comfortable, protective fit. In some cases, mid level masks contain more padding than elite level masks, in terms of overall mass. Weight and density are the main differences between the padding found in mid level masks and elite level masks. Mid level masks contain more, thick vinyl foam than elite level masks, but fewer variations of foam densities. The benefit of using several types of foams (aka Dual Density, Triple Density, etc.) with different densities is that the padding can be more strategically placed to provide optimal protection and comfort in specifically targeted areas. Mid level masks contain more types of foam than entry level masks but less than elite level masks.
Entry Level Goalie Masks ($250 and under)
 Children and low level recreational goalies are far less likely than mid and elite level goaltenders to face dangerous, high velocity shots. This isn’t to say that a relatively weaker shot can’t still cause damage, but the amount of protection required is proportional to the level of competition at which the goaltender is playing. We are not suggesting that you ought to simply go out and try to find the cheapest mask available if you’re a beginner. You only get one head and you ought to protect yourself accordingly, taking every precaution necessary to limit the threat of suffering a serious head injury. Always wear a mask that is HECC and CSA certified.
Shell
Entry level masks are typically constructed with fiberglass, Lexan plastic or a similar plastic-based compound. Certain parts of the mask, such as the chin and forehead, may be moderately reinforced with carbon composite, but these materials are used more sparingly on entry level masks.
Cage
Once again, cages don’t vary too much from low, to mid, to high end masks. Entry level masks usually come with standard cages rather than cateye cages, although there are exceptions. If you’re a beginner, it’s important to note that not all cages are certified for use in organized USA hockey games. Some cat-eye cages have holes that are too large to keep the end of a players stick from poking through the wires. Some leagues check for certification while others do not. The key is to find a cage that is certified and allows you to see through the wires without much visual interference.
Padding
The padding found in entry level masks is usually single or dual-density VN (vinyl nitrile) comfort foam, which is thick and fairly soft. Less foam variations are found in entry level masks than in mid and advanced level masks. This means that the mask is likely to be just a little bit heavier and may not absorb quite as much shock as the padding in a competitive or elite level mask.
Goalie Mask Fit & Sizing
Sizing for goalie masks varies from one model to the next. Charts containing head circumference measurements and/or hat sizes are provided by the manufacturers for each specific model. Make sure you refer to the appropriate chart when purchasing a new mask rather than assuming that all models are consistently sized.
Hockey Goalie Sticks Buying Guide
Here is some advice from HockeyGiant.com on how to buy Goalie Sticks
Choosing the proper goalie stick is an important decision because it will affect your stance, puckhandling abilities and, to a certain degree, your mobility. Like players’ sticks, goalie sticks are constructed with several, varying characteristics which include Lie, Curve Type, Curve Depth, Face Angle and Paddle Length (not applicable to players’ sticks). In addition to these various attributes, different construction materials such as wood, fiberglass and carbon composite are used to make goalie sticks, with each material offering slightly different performance benefits and results. Understanding the differences between each of these options will help you decide which goalie stick will work best for you.
Construction Materials
Composite Goalie Hockey Sticks
Composite sticks are made with materials such as carbon fiber and graphite, which are usually lighter and, in some cases, more durable than wood goalie sticks. Composite goalie sticks aren’t really affected by water the way that wood sticks are.
Wood Goalie Hockey Sticks
Goalie sticks made with wood offer the best overall «puck feel», in the opinion of most goaltenders. Wood absorbs shock a little better than composite materials, making it easier to control the puck after making a stick save. Wood blades, apart from their high susceptibility to water damage, are often just a bit stronger and more resilient than composite sticks. Depending on how much you’re willing to spend, you can find wood sticks that compete with or completely outperform many composite sticks.
Foam Core Blades
Some wood goalie sticks and most composite goalie sticks have foam-injected blades that are able to absorb a greater amount of shock than solid wood and solid composite blades. Without a foam core, most graphite and carbon fiber blades feel dead when you’re handling the puck. The foam core makes a composite blade feel a bit more like a wood blade, and it makes a wood blade feel even better than a solid wood blade. That being said, foam core blades are not a «cure-all» solution to the common weight-feel-durability issues. In the end, it all comes down to material quality – you get what you pay for.
Goalie Stick Attribute Options
Goalie sticks, like players’ sticks, come with different blade patterns to choose from. In addition to curve type, depth, lie and face angle, goalie sticks have varying paddle lengths. Each of these attributes ought to be considered carefully when you’re choosing the stick that will work best for you. Apart from paddle length, which is more of a size-related measurement than the others, the options available to choose from are almost completely preference-driven, but will certainly have a noticeable impact on the way you play the puck.
Regular vs. Full Right Goalie Sticks
The handedness of a goaltender is either Regular or Full Right, and this classification is determined by the hand upon which the catcher is worn. Regular goalies wear the catching glove on the left hand and the blocker on the right hand. Regular goalie sticks are held in the right hand and are curved like left handed players sticks. Full right goalies wear the catcher on the right hand and the blocker on the left hand. Full right goalie sticks are held in the left hand and are curved like right handed players sticks. Simply put, Regular goalie sticks are held in the right hand, and Full Right goalie sticks are held in the left hand.
Blade Lie
Lie is a measurement used to represent the angle of the paddle and blade of a goalie stick. This number is usually 11 or 12 with youth and junior sticks, and 13-15 for intermediate and senior sticks. If you are short or have a low stance, you ought to use a lower lie so that the blade rests flat on the ice. If you are tall or have an upright stance, you ought to use a higher lie so that the blade rests flat on the ice. The higher the lie, the more the stick looks like the letter ‘L’. Paddle length also has an effect on blade lie, but we’ll discuss that later.
Curve Type & Depth
Goalie sticks aren’t offered in quite as many varying curve types as player sticks. Typically, manufacturers produce a couple heel curve options and a couple mid curve options, differing slightly in depth. If you have a strong tendency to play the puck, then you will probably benefit from using a deeper curve, which will allow you to lift the puck more easily. Straighter blades may allow you to stop and settle the puck with greater predictability.
Blade Face Angle
Face angle affects the trajectory of the puck when you pass it. A closed face angle will allow you to keep the puck lower to the ice when you pass it and may also help you keep the puck on the ice and control it when you stop a shot. An open face angle will allow you to lift the puck with greater ease when you make a pass or clear the puck out of your zone.
Paddle Length
From manufacturer to manufacturer, paddle length measurements are often fairly inconsistent. Typically, the paddle is measured from the point on the shaft where the paddle begins down to the underside of the blade heel. But, unfortunately each manufacturer does it just a little bit differently. In any case, the paddle length must be taken into consideration when you’re choosing a stick. The longer your paddle is the higher up you will have to lift your arm in order to keep the blade flat on the ice, and vice versa. If your paddle is too long, you’ll have to lift your blocker arm up higher than you probably ought to. If your paddle is too short, you’ll have to lower your arm more than you ought to in order to keep your blade flat on the ice. Lifting or lowering your blocker arm in order to compensate for improper paddle length causes your blocker to be moved out of position. This is why the lie and paddle length go hand in hand.
Appropriate paddle length is determined by the height and stance of the goaltender. A tall, upright goaltender around the height of 6’3″ will use a longer paddle, perhaps 27″ or 28″ long. A shorter, low-crouching adult goalie around the height of 5’5″ is likely to use a 25″ or 26″ paddle. But, your height alone isn’t usually enough information to make a good, accurate decision for paddle length. It’s a good starting point, but ultimately you’ll only be able to get a perfect fit by holding the stick in your hand while you’re standing in the crouched, ready position.
How Much Should I Spend On a Goalie Stick?
Deciding how much to spend on a goalie stick is a fairly simple matter. The real questions ought to be, «What’s the difference between a $40 dollar stick and a $240 dollar stick?» and, «What price range is appropriate for my level of play?»
Most goalie sticks under $100 are made with wood and fiberglass, which are perfectly appropriate materials for goalie sticks. Wood and fiberglass materials are much cheaper for manufacturers because they are heavier and often less pliable than graphite and carbon fiber composite sticks. Sticks over $200 are almost invariably composite sticks made with the highest quality materials available. The lower the price, the less carbon, graphite, Kevlar or other composite materials are used in the construction of the stick, which means that the stick is likely to be a bit heavier – although, there are exceptions. As the price increases, so does the quality of the materials being used. It’s really that simple.
Sometimes, you’ll also find that more expensive sticks will have features such as a texture grip on the handle at the top of the paddle, in addition to a fancy paint job and a cleaner overall finish. Goalie sticks aren’t very complicated pieces of equipment, so you won’t necessarily find many «special features» on a goalie stick like you would with a pair of ice hockey skates, for example. It’s all about material quality.
Spend what you’re comfortable spending, but do your best to choose a stick that is priced in proportion to the level of competition at which you’re playing. If you’re in a Tuesday night beer league, you probably don’t need a $250 dollar stick. If you’re playing AAA travel hockey then you’re likely to benefit from using a stick that may cost well above $40 bucks.